
Food Waste Feast’s 2 Favorite Recipes to Make with Beans
Plus tips from a chef on how to cook with dried beans and ditch the cans
We all know having a can of beans on hand means whipping up dinner can happen pretty quickly. While we love a quick and easy dinner, we aren’t as thrilled by a meal that might introduce us to some unnecessary chemicals. Why would whipping up some rice and beans do that? The quick answer is that cans are often lined with BPA, a substance often used to line aluminum cans to keep the food inside from reacting with the metal. So, we talked to a chef Mei Li, co-founder of restaurant Mei Mei in Boston, MA, forthcoming cookbook author, and co-founder of Food Waste Feast, to figure out what’s up with dried beans.
Guess what we learned – dried beans aren’t that scary.
And, they can be just as easy to use and maybe even more versatile than canned beans because you can make whatever amount you need. You can even prep them in a way that removes some of the enzyme that causes gas. The only difference is you have to do a little bit of prep. But, with an afternoon of prep, you can have the equivalent of a couple of cans of beans in your freezer ready to go – just like cans in your pantry. Bonus, if you buy them in the bulk area and bring your own bags/jars they are completely zero waste, and pretty cheap.
“Dried beans are more flavorful than canned, and are great to have in your fridge or freezer to add bulk and protein to a meal. Plus, the cooking liquid can make a delicious base for a soup or stew, especially if you add herbs or aromatics like garlic or onions as you cook your beans,” said Chef Li, about why she loves using dried beans.
So, from our friend Mei, here are a couple of ways to prep dried beans. After you’ve properly hydrated and prepared your beans, we have a couple of suggestions for storing them. One of our favorite ways is to store them in repurposed glass jars. The beans can go with some of the cooking liquid into the glass jars and into the fridge if you will use them in the next couple of days. If you won’t use them soon, they can go like that into the freezer too (after they have reached room temp), just microwave them for a bit to get them out of the jar. Or, you can drain them, spread them out on a plate or cookie sheet, freeze them, then once they are frozen, measure out about a cup and a half (which is the same as a standard can of beans) into glass jars or silicone bags and keep them in the freezer. They last for about 8 months in the freezer.
Tips from Mei:
If you don’t cook dried beans or peas often, here are a few helpful things to know:
- Rinse your beans before cooking, as they’re not always cleaned before packaging
- Soaking dried beans will make them cook more evenly, plus can help remove the enzyme that causes gas. If you don’t soak your beans, they’ll take longer to cook. If you do soak them, you can just pop them into a large bowl with a pinch of salt, cover them with a few inches of water and leave them for 12-24 hours (so you can do them before you go to bed and cook them the next night for dinner), then drain and rinse.
- If you only have a few hours, you can do a fast soak by boiling the beans with a pinch of salt over high heat and letting them sit an hour, then draining and rinsing.
Read more about how to cook your beans on Food Waste Feast’s website.
Once you’ve cooked your beans, here are two of Mei’s favorite (and delicious!) recipes to whip up that use things you probably already have in your fridge and pantry.

Mei Li, Food Waste Feast
Leafy Greens Salad with Little Fish and Spiced Chickpeas
This feeds roughly 4 people, but you can easily increase or decrease amounts to feed more or less. Leave out the fish if you’re cooking for vegetarians, and this dish is gluten-free (although if you do eat gluten, crunchy breadcrumbs or croutons are always welcome).
Here’s what you need:
- 2 cups cooked chickpeas or beans of your choice, laid out on a tea towel or paper towel to dry for a few minutes if pulled from liquid so they’ll get crispier
- extra-virgin olive oil
- a few shakes each of the spices of your choice – I used paprika, cumin and turmeric
- 6 to 8 cups leafy greens of your choice, from light lettuce leaves to heartier greens like the kale used above
- A small tin of anchovies or sardines or tuna (optional)
- 1 avocado, sliced (or any other veggies you want)
- Optional toppings: breadcrumbs or croutons, nuts such as sliced almonds or pine nuts, shaved Parmesan or another cheese
- Lemon juice or vinegar of your choice
- Kosher salt and freshly ground pepper
- 4 eggs, cooked to your liking
Preheat the oven to 400 degrees. Lay out the chickpeas on a rimmed baking sheet lined with parchment and bake for 30 to 40 minutes. Once cooled slightly, toss in a bowl with a drizzle of olive oil and a pinch of the spices of your choice. Set aside while you make the rest of the salad.
Place your greens in a bowl and toss with lemon juice, more olive oil, and kosher salt. I usually just do this by feel, but you’re aiming for about 1 part acid (lemon juice or vinegar) to 2 or 3 parts olive oil. If your greens are heartier, like kale or chard, massage the dressing in to wilt the leaves a bit. Top with the tinned fish of your choice and other veggies and other items you’re using. Add your eggs and enjoy!
Mei Li, Food Waste Feast
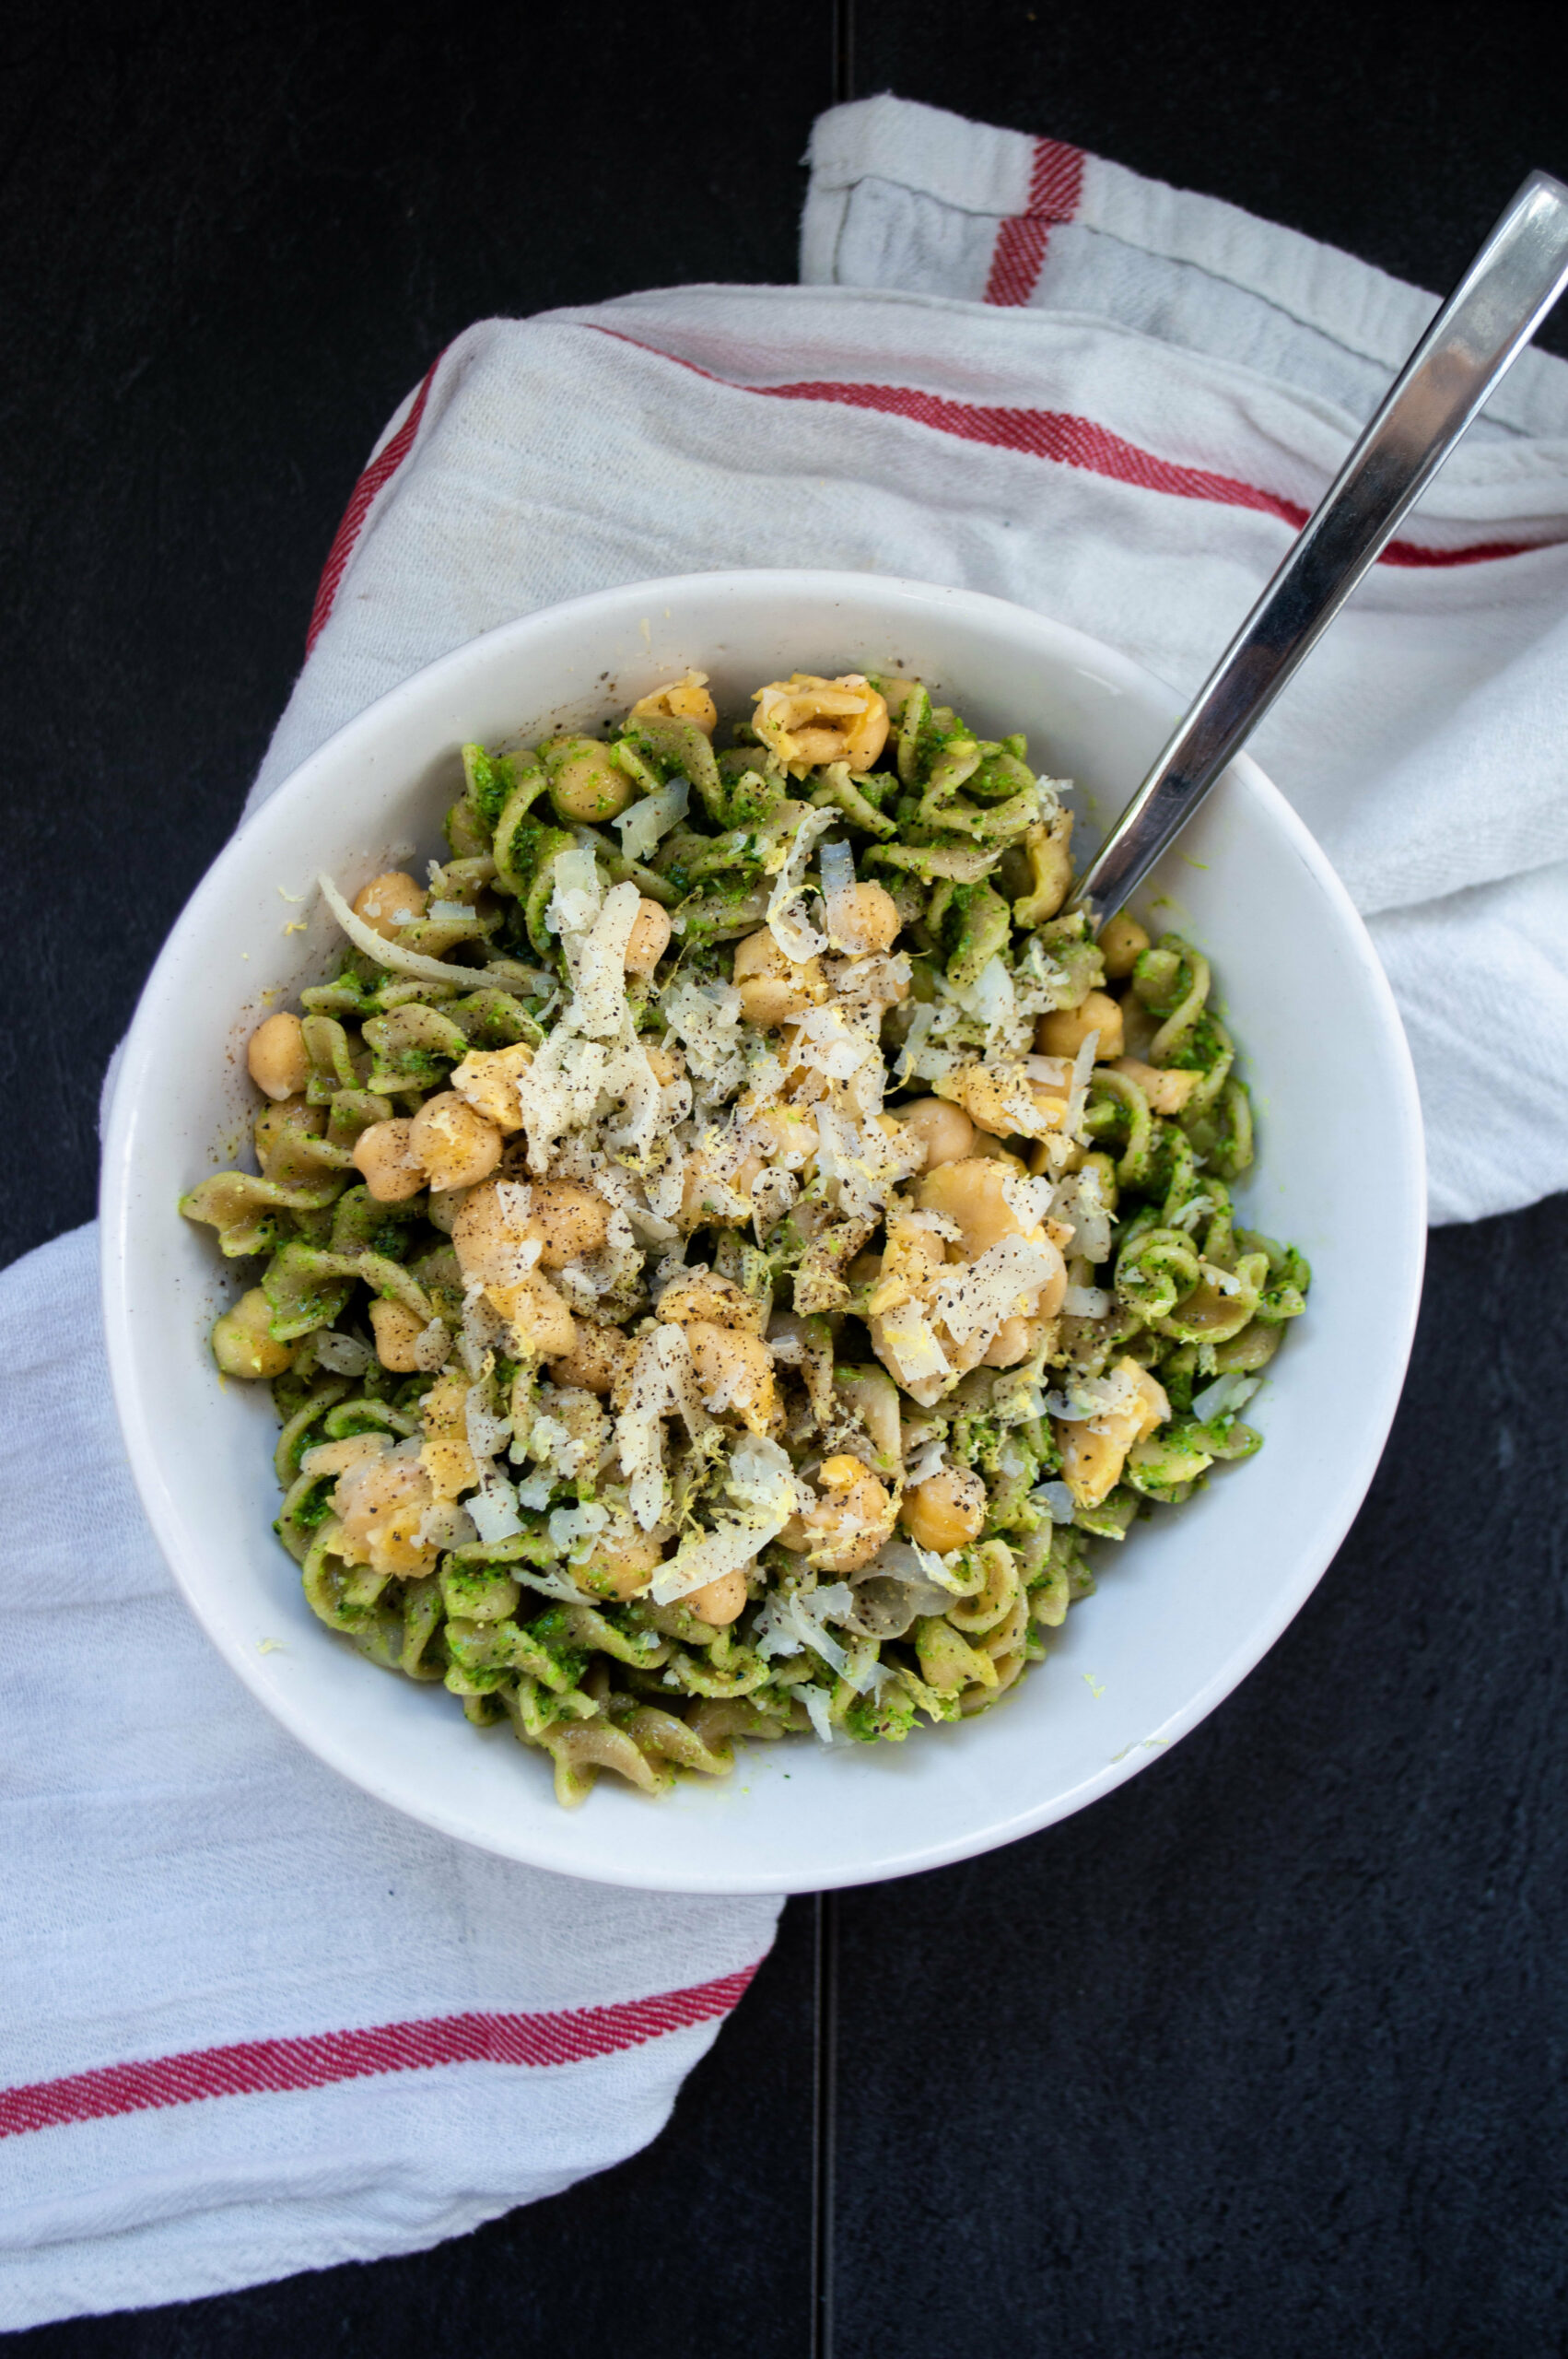
And, Kale Stem Pesto Pasta with Chickpeas or Beans
This vegetarian dish can be made vegan by leaving the cheese out of the pasta and pesto. Use gluten-free noodles or leave out the nuts to accommodate for those dietary restrictions. If you already have the chickpeas cooked, the dish can be done in less than half an hour, especially if you multitask and make the pesto while the pasta is cooking.
Here’s what you’ll need:
For the pesto
- A food processor or blender
- 3 cups kale and arugula with stems, or other leafy greens or herbs from chard to basil (use all stems here, set aside the leaves for tomorrow’s salad
- 1 smashed garlic clove
- ½ cup grated Parmesan or other hard cheese
- ¼ cup nuts of your choice, like walnuts or pine nuts (optional – I toss them in if I have them in the kitchen)
- About ¾ cup extra-virgin olive oil
- Kosher salt
For the pasta
- A large pot
- 12 ounces of dried pasta of your choice
- 2 cups cooked chickpeas or white beans, or another bean of your choice
- A few leaves of whatever salad greens you’re using, for flavor and texture
- Grated Parmesan or another hard cheese, for garnish
To make the pesto, wash and clean your greens, roughly chop them, and set aside some leaves for tomorrow’s salad. Ideally, put the greens in the fridge in a loose bag with a paper towel or clean cloth inside to soak up any extra moisture. You’ll want about 3 cups of leaves and stems for the pesto – I used all the stems from a bunch of kale and they blended up easily.
Add the greens to your food processor or blender along with the garlic, cheese, and nuts. Pour in about half the olive oil and pulse to combine everything into a paste. Slowly drizzle in the remaining olive oil until the pesto reaches a loose saucy consistency. Add a generous pinch of salt and then season to taste.
To make the pasta, bring a large pot of salted water to the boil and cook your pasta according to package directions. Drain and transfer to a large serving bowl, then stir in your cooked chickpeas. Toss with ample pesto and season to taste. If you’d like to add some leafy greens and grated cheese or anything else you like on your pasta, go for it.